The Art of Polishing Natural Stone: Tips from the Pros

Natural stone surfaces, such as marble, granite, limestone, or travertine, bring elegance and sophistication to any space. However, due to wear, scratches, and exposure to moisture and dirt, these surfaces can lose their shine over time. Polishing natural stone is essential for restoring its glossy finish and enhancing its durability.


Why Polishing Natural Stone is Important

Polishing is not just about aesthetics—it also serves several practical benefits:

  • Restores Shine – Natural stone can lose its luster over time due to foot traffic, spills, and regular use. Polishing rejuvenates the surface.
  • Protects Against Stains – A polished surface makes it more resistant to stains and moisture absorption.
  • Smooths Imperfections – Proper polishing techniques can diminish or remove Minor scratches and etching.
  • Extends Longevity – Regular polishing helps maintain the integrity of the stone, ensuring it lasts for decades.


Step-by-Step Guide to Polishing Natural Stone Like a Pro

1. Identify Your Stone Type

Different types of natural stone require different polishing techniques:

  • Marble & Limestone – Soft, porous stones require gentle polishing to avoid scratches.
  • Granite & Quartzite – Hard, dense stones that require diamond polishing pads for effective results.
  • Travertine – Porous and textured, requiring extra sealing after polishing.
  • Slate – Naturally rough, often enhanced with a stone enhancer rather than polished.


Understanding your stone type ensures you use the right products and techniques.


2. Clean the Surface Thoroughly

Before polishing, the stone surface must be free of dirt, debris, and stains.


How to Clean Natural Stone Before Polishing:

  1. Remove loose dirt – Sweep or dust the surface.
  2. Use a pH-neutral cleaner – Mix warm water with a mild stone cleaner or a few drops of dish soap.
  3. Wipe with a soft cloth or mop – Avoid harsh brushes or scrubbing pads.
  4. Dry the surface completely – Let it air dry or use a microfiber cloth to remove excess moisture.


Pro Tip: Avoid acidic or abrasive cleaners, which can etch the surface and make polishing more difficult.


3. Select the Right Polishing Method

Two main methods for polishing natural stone are DIY hand polishing and machine polishing.

DIY Hand Polishing (For Small Areas)

Hand polishing is a practical option if you have a small surface, such as a countertop or tabletop.


What You Need:

  • A stone polishing powder or compound (specific to your stone type)
  • A soft cloth or buffing pad
  • Water


How to Hand Polish:

  1. Apply polishing powder – Sprinkle a small amount on the surface.
  2. Dampen a soft cloth – Use water to create a paste-like consistency.
  3. Buff in circular motions – Gently rub the surface until the shine starts to appear.
  4. Wipe clean – Use a damp cloth to remove any excess residue.


Pro Tip: Use a high-quality stone polish spray after buffing for extra shine.


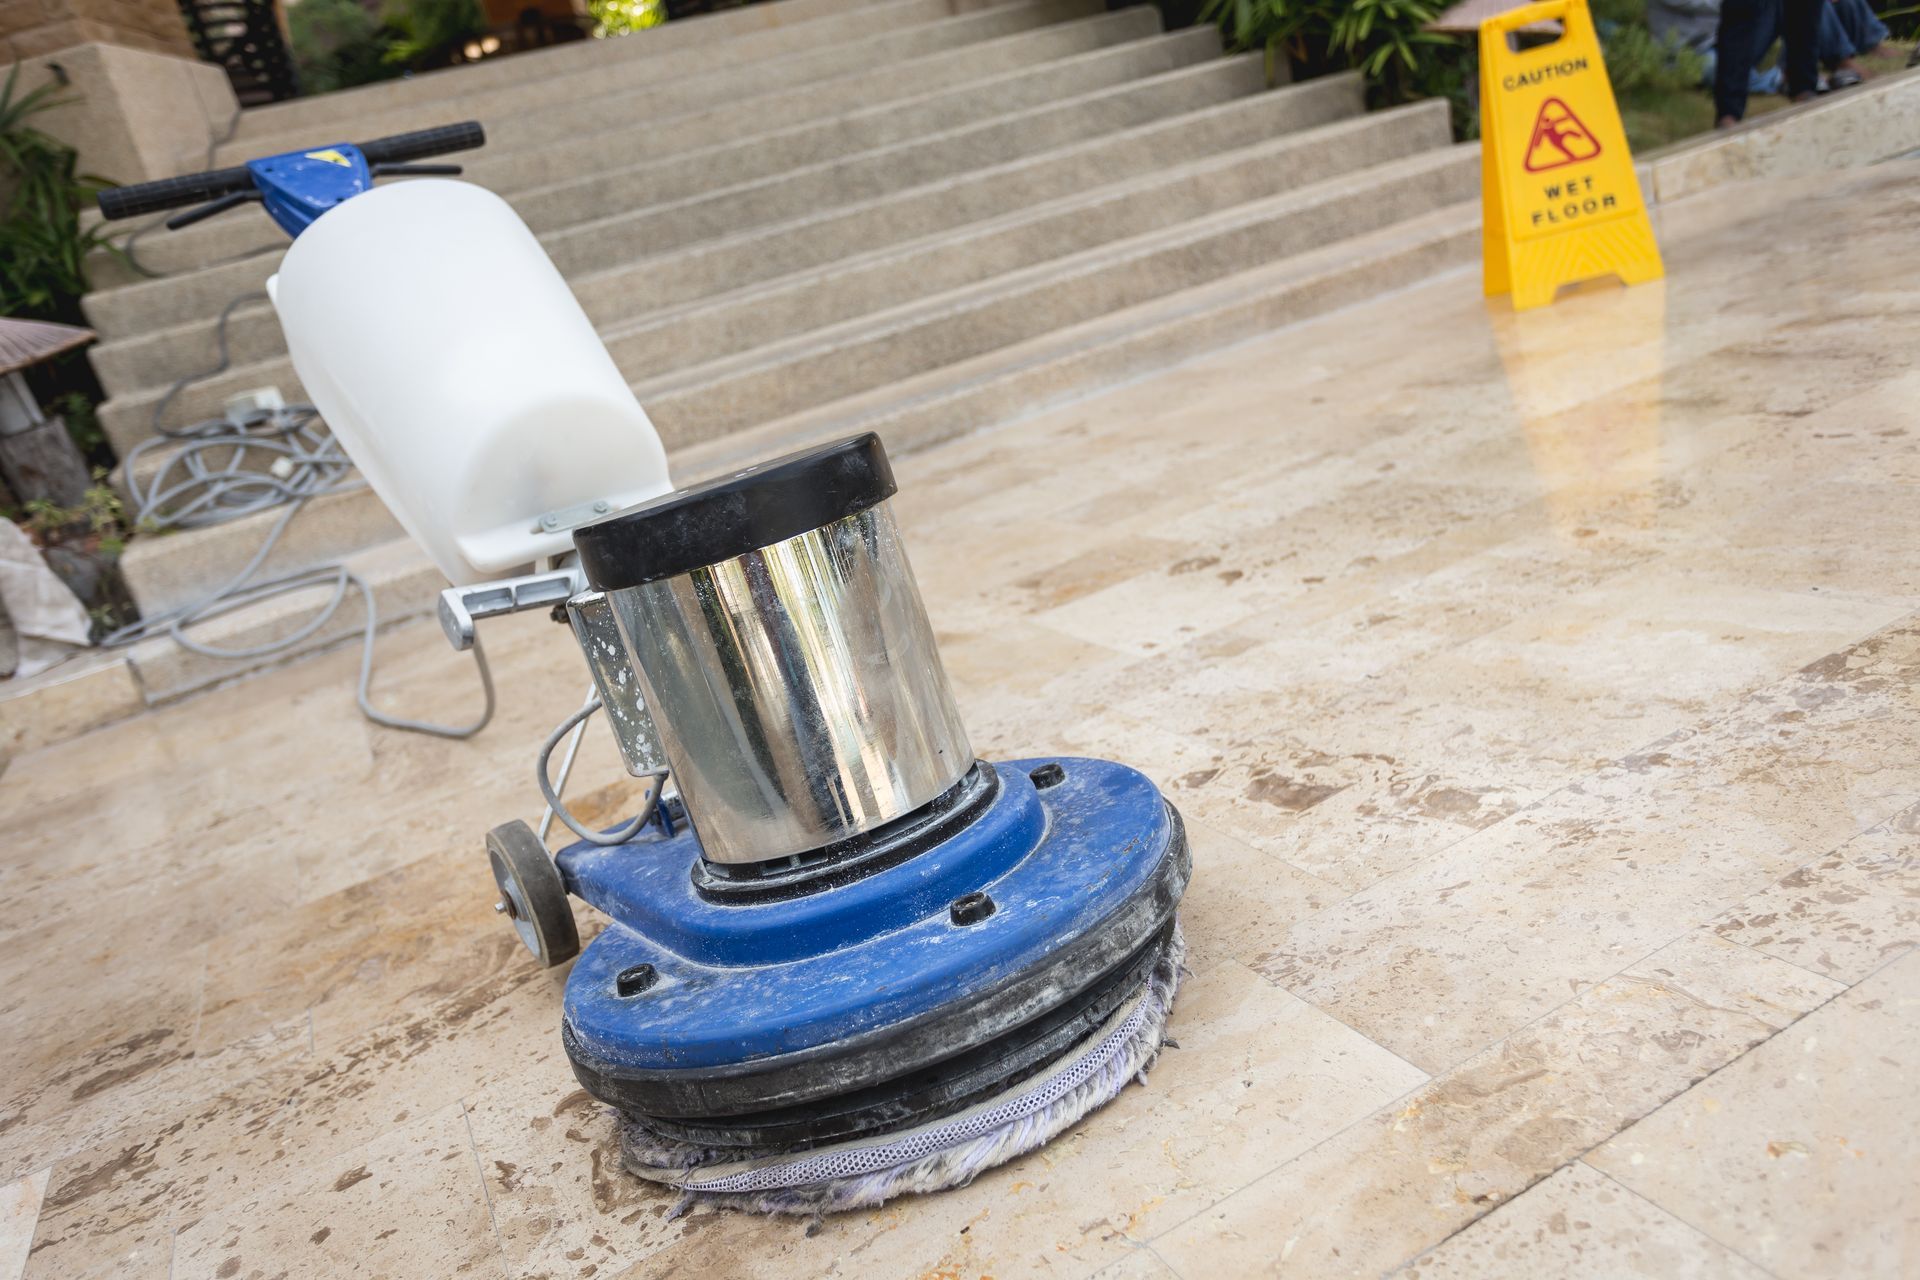
Machine Polishing (For Floors and Large Areas)

A machine polisher is the best option for larger surfaces, such as stone floors or walls.


What You Need:

  • A variable-speed stone polisher (also known as a buffer)
  • Diamond polishing pads (grit levels ranging from coarse to fine)
  • Water spray bottle
  • A sealant (optional, but recommended)


How to Machine Polish:

  1. Attach a low-grit diamond polishing pad (e.g., 50-100 grit) to the polisher.
  2. Lightly wet the surface – Use a spray bottle to prevent overheating.
  3. Begin polishing in sections – Move the machine in circular motions over the stone.
  4. Gradually switch to finer grits – Increase the grit level (200, 400, 800, 1500, and 3000) for a smoother finish.
  5. Wipe down the surface – Remove dust and excess polish residue with a clean cloth.


Pro Tip: Always keep the surface slightly damp while polishing to avoid friction burns on the stone.


4. Seal the Stone After Polishing

After polishing, sealing your natural stone is highly recommended, especially for porous stones like marble, limestone, and travertine.


How to Apply a Sealer:

  1. Choose a high-quality stone sealer – Look for a penetrating sealer suitable for your stone type.
  2. Apply with a soft cloth or sponge – Work in even layers.
  3. Allow time to absorb – Let the sealer sit for 10-15 minutes.
  4. Buff away excess – Use a clean, dry cloth to remove any leftover sealer.


Pro Tip: Sealing protects against stains, water damage, and daily wear. Depending on usage, it should be reapplied every 6-12 months.


5. Maintain the Shine with Regular Care

Once your natural stone is polished, follow these maintenance tips to keep it looking flawless:


Use pH-neutral stone cleaners – Avoid acidic substances like vinegar, lemon juice, or harsh chemicals.
Wipe up spills immediately – Prevent stains from setting.
Use coasters, mats, and rugs – Protect surfaces from scratches and heat.
Re-polish as needed – Consider light re-polishing for high-traffic areas every 6-12 months.


Common Mistakes to Avoid

🚫 Using acidic cleaners – These can etch and dull the surface.
🚫
Skipping sealing – Unsealed stone is more prone to stains and damage.
🚫
Using rough pads or steel wool – These can scratch and ruin the finish.
🚫
Applying too much polish – Overuse of polish can create residue buildup.


Final Thoughts

Polishing natural stone is an essential step in maintaining its beauty and durability. Whether refreshing a marble countertop, restoring a granite floor, or enhancing the look of travertine tiles, the right techniques and tools will ensure a flawless finish. With proper cleaning, polishing, and sealing, your natural stone surfaces will continue to shine for years.


If your stone requires extensive restoration or you are unsure about the process, consider hiring Marble Stone Polish for expert results. A well-maintained natural stone surface is a valuable investment and a timeless feature in any home.

By Kaylee Toole June 9, 2025
Natural stone brings elegance and luxury to bathroom spaces, but it also comes with unique maintenance challenges. Bathrooms are high-moisture environments where water exposure, humidity, and poor ventilation can lead to mold, mildew, and water damage if stone surfaces are not adequately cared for. Whether you have marble, travertine, limestone, or granite in your bathroom, the key to preserving its beauty is routine care and moisture control. 1. Choose the Right Stone and Finish Before we dive into care tips, it's essential to understand that not all natural stones are created equal in terms of moisture resistance. Granite and quartzite are denser and more resistant to water damage. Softer stones, such as marble, limestone, and travertine, are more porous and absorb moisture more readily. Polished finishes offer more protection against water and staining than honed or tumbled finishes. If you're remodeling, choosing a less porous stone or a sealed polished finish can reduce maintenance needs. 2. Seal Your Stone Surfaces Regularly Natural stone is porous, meaning it can absorb water, soap residue, and body oils. This absorption can lead to staining, etching, or mold growth over time. A high-quality penetrating sealer provides a protective barrier that repels moisture and contaminants, offering enhanced protection against environmental damage. How often you should seal your bathroom stone depends on the type of stone and the amount of use the bathroom receives. Generally, sealing once or twice a year is recommended for high-moisture areas, such as showers and floors. How to Test Your Sealant: Sprinkle a few drops of water on the stone. If the water beads on the surface, the seal is still effective. If it soaks in and darkens the stone, it’s time to reseal. 3. Improve Ventilation and Airflow Poor ventilation is one of the most significant contributors to mold and mildew growth in bathrooms. Without proper airflow, moisture lingers in the air and on surfaces, creating the perfect environment for mold spores. Tips to improve ventilation: Use an exhaust fan during and after showers Leave the bathroom door open when not in use Wipe down shower walls and countertops after use Use a dehumidifier if the bathroom lacks adequate airflow 4. Clean Regularly with Stone-Safe Products Cleaning natural stone surfaces with the right products helps remove residue before it can penetrate the stone or encourage the growth of mold. Avoid using bleach, vinegar, or acidic bathroom cleaners, as they can damage the surface and degrade the sealer. Instead, use: A pH-neutral stone cleaner A soft microfiber cloth or non-abrasive sponge A squeegee for glass and polished stone surfaces in the shower Clean shower walls and floors at least once a week. Wipe down vanities and countertops daily. 5. Address Grout and Caulk Lines Grout and caulk lines are often overlooked but are among the most vulnerable parts of a bathroom. They can crack, separate, or absorb moisture over time, providing a breeding ground for mold and mildew. Even sealed stone is at risk if the grout is compromised. Inspect grout and caulk regularly. Reseal grout annually, and replace cracked or deteriorated caulk as soon as possible. Mold that forms in grout lines should be treated quickly with a stone-safe mold remover. 6. Avoid Leaving Standing Water Leaving water to sit on your stone surfaces can lead to water spots, discoloration, or eventual deterioration of the sealant. This is especially important in stone showers and on bathroom vanities. After using the shower or washing your hands, make it a habit to: Wipe down countertops and sinks Squeegee water from the shower walls and floors Dry off any wet areas to prevent water from soaking into the stone 7. Watch for Signs of Water Damage Early signs of water damage include: Darkened stone or water rings Efflorescence (white powdery residue) Dull or etched spots on polished surfaces Musty odors or visible mildew If you notice any of these signs, take action immediately. You may need to reseal, deep clean, or, in some cases, consult a professional for restoration. Conclusion Natural stone can be a stunning and durable choice for bathrooms, but it needs special attention in wet and humid environments. Regular sealing, proper cleaning, moisture control, and maintenance of grout and caulk are crucial in preventing mold, mildew, and water damage. With a few consistent habits and the proper care routine, your bathroom’s stone surfaces can maintain their beauty and strength for years to come. If your stone is showing signs of wear or damage, consider consulting a professional for a deep cleaning, polishing, and sealing treatment to restore its original condition.
May 12, 2025
The COVID-19 era brought increased awareness around hygiene and disinfection in our homes and businesses. While keeping surfaces clean and germ-free is essential, it's equally important to ensure that your cleaning methods don’t damage the surfaces themselves, especially when it comes to natural stone like marble, granite, limestone, and travertine. Natural stone is beautiful and durable, but also porous and sensitive to certain chemicals. Using the wrong disinfectants can lead to etching , staining , and dulling of the stone’s finish. In this article, we’ll walk you through how to safely disinfect natural stone surfaces without compromising their integrity. Why Traditional Disinfectants Can Be Harmful to Stone Many common disinfectants contain acidic ingredients like vinegar , lemon juice , or bleach , which can: Etch the stone, leaving dull spots or cloudy patches. Break down sealants , reducing the stone’s resistance to moisture and staining. Discolor the surface, especially on light-colored stones like marble and limestone. Even alcohol-based products can cause long-term issues if used too frequently or left on the surface without wiping. Safe Disinfection Methods for Natural Stone 1. Use a pH-Neutral Stone Cleaner with Antibacterial Properties Some stone-safe cleaners are formulated to disinfect without causing harm. Look for labels that specify: pH-neutral Safe for natural stone Antibacterial or antimicrobial action These products are ideal for daily or weekly cleaning and gentle enough for regular use. Pro Tip: Brands like StoneTech , Granite Gold , or Weiman offer stone-safe disinfectants designed for marble, granite, and more. 2. Use 70% Isopropyl Alcohol – With Caution When stronger disinfecting is needed (such as after exposure to illness), isopropyl alcohol can be used, but carefully. How to use it: Mix 70% isopropyl alcohol with distilled water in a 1:1 ratio. Lightly mist the solution onto the surface. Let it sit for 30 seconds to disinfect. Wipe dry with a soft microfiber cloth. Follow with a pH-neutral stone cleaner to remove any residue and restore shine. Avoid prolonged exposure , and never use alcohol on unsealed stone, as it can dry out or damage the surface. 3. Use Disposable Disinfectant Wipes , Sparingly During peak COVID times, many people turned to disinfectant wipes. While convenient, most contain quaternary ammonium compounds or alcohol, which can harm natural stone over time. If using disinfectant wipes: Test on a small, inconspicuous area first. Wipe the area with water and a soft cloth immediately after use. Don’t use regularly, save for occasional high-risk scenarios. Disinfecting Products to Avoid To prevent damage, do not use the following on natural stone surfaces: Vinegar or lemon juice Bleach or hydrogen peroxide Ammonia or window cleaners Generic antibacterial wipes (e.g., Clorox, Lysol) without rinsing Abrasive scrubbing pads These can etch, dull, discolor, or weaken the protective seal on your stone. Daily Cleaning vs. Disinfection It's important to distinguish between cleaning and disinfecting : Cleaning removes dirt, oils, and debris from the surface. Disinfecting kills bacteria, viruses, and other pathogens. For natural stone, daily cleaning with a pH-neutral cleaner is enough in most households. Reserve disinfecting for situations that truly call for it, such as illness in the home, handling raw meat, or post-exposure to public surfaces. Don’t Forget to Reseal Disinfecting, even with safe products, can gradually wear down your stone’s protective seal. To maintain water and stain resistance: Check your seal every 6–12 months. Reapply a stone-safe sealer if water no longer beads on the surface. This will keep your stone protected and make cleaning (and disinfecting) easier in the long run. Final Thoughts Disinfecting your home shouldn’t come at the cost of damaging your beautiful natural stone surfaces. By choosing the right products and following a few simple precautions, you can keep your stone clean, sanitized, and stunning for years to come. Need help restoring dull or etched stone? Marble Stone Polish offers professional stone cleaning, polishing, and sealing to bring your surfaces back to life, safely and effectively. Contact us today for a free consultation!